Bandlab makes producing music with MIDI super easy. MIDI is cool but if you’re a guitarist like me, you’ll want to record your real instruments. This Bandlab tutorial will walk you through different methods for recording real instruments like guitars, basses, banjos, etc.
The Bandlab editor features dedicated tracks for real instruments like guitar, bass, and vocals. There are a few different methods for getting these real instruments recorded, so we’ll start with the easy method first.
Read More: Interested in Lofi? Check out our article and learn how to make a Lofi beat with BandLab!
Table of Contents
Recording Real Instruments with Bandlab Using Built-In Microphones
Recording real instruments that do not require amplification (e.g., acoustic guitar, banjo, percussion instruments, etc.) is easy. You can simply use the built-in microphone on your phone or laptop to capture the sound.
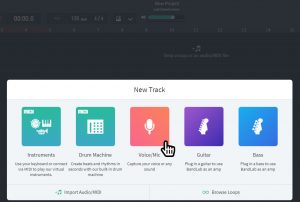
To get started, create a new project in Bandlab. You’ll then be presented with a few options up front that let you create your first track, but you’ll want to select the Voice/Mic option. We’ll discuss the guitar, bass, and other dedicated tracks later on.
Even though it says Voice/Mic track, this track can be used to record anything via the microphone on your laptop or phone. In my example below, I recorded my acoustic guitar riff and renamed the track to Acoustic Guitar:

And it’s that easy! Now, you can slap on some headphones, create multiple voice/mic tracks, and record guitars, percussion, finger snaps… whatever you want!
But, what about quality? You may be wondering if this is the best method for recording your real instrument… and while it may be easy, it’s probably not the best in terms of sound quality. You’re essentially recording everything in your environment (e.g., static, background noise, etc.) along with your instrument, so you’ll want to make sure you’re in a quiet space. The sound quality is also dependent on your device’s microphone; my laptop’s built-in microphone is absolute garbage, so this would be a terrible method for me to utilize if I was using my laptop. However, my iPhone has a pretty decent-quality mic — I could get some OK-ish low-quality recordings using it.
You may think this method couldn’t really be utilized for professional recordings; however, Billie Eilish producer FINNEAS, recorded an acoustic guitar with his iPhone — with background static, noise, and all — and used it on one of his debut EP tracks (Partners in Crime, if you’re interested). So, sometimes the easiest method can work!
Read More: Get your best tone using free or paid guitar impulse responses!
Recording Real Instruments in Bandlab with an Audio Interface
If you want more control over your sound and want to plug in your electric guitar or bass directly, you’re going to need an audio interface. An audio interface is an external device that lets you connect professional microphones and instruments like electric guitars to your computer or mobile device.
These devices can be connected to a laptop via USB, firewire, thunderbolt, or through your 1/8″ input jack (i.e., standard mic input). You can then connect an external microphone or plug in your electric guitar or bass directly into the interface.
Thankfully, Bandlab has made it super easy to do this with their very own audio interfaces. Any audio interface will work, but we’ll take a look at a few of the options made specifically by Bandlab. However, I highly recommend using a digital interface (e.g., connecting via USB, firewire, or thunderbolt) that will offer plug-and-play compatibility with Bandlab or any other DAW.
Bandlab Link Digital and Bandlab Link Digital Duo
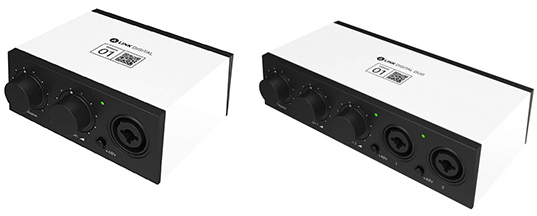
Bandlab Link Digital and Bandlab Link Digital Duo offer plug-and-play compatibility with computers, laptops, and tablets via the USB-C connection. They both feature a combo 1/4″ and XLR input for use with a standard guitar cable or microphone, with the Duo having two inputs instead of one for multitracking capabilities. There’s also built-in Phantom Power (48v) which offers direct power to any microphones that may require it. The Link Digital or Link Digital Duo are perfect for laying down tracks on your laptop — just make sure you have a free USB-C port open. The only downside to these interfaces is that you won’t be able to record on most phones or tablets (except for the latest iPad Pro which features a USB-C connection).
Bandlab Link Analog Mini
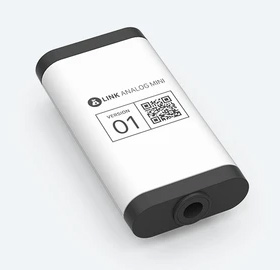
The Bandlab Link Analog Mini is the latest audio interface from Bandlab. Simply connect this device to your mobile device via the 1/8″ output, plug in your guitar or bass, and then connect to Bandlab or any DAW including FL Studio, GarageBand, and more to lay down some tracks. It’s easy and convenient to get tracks recorded fast. It features a 1/4″ input jack for plugging in guitars, basses, etc., and 1/8″ headphone output along with a 1/8″ TRRS speaker output. The best part is that the Bandlab Link Analog Mini does not have an internal battery like previous models — so no more waiting until your device is charged to lay down tracks, you can do it anytime! Click here to check out a Bandlab Link Analog Mini video review from Dark Roast Recording to see how easy it is to use.
Bandlab Link Analog
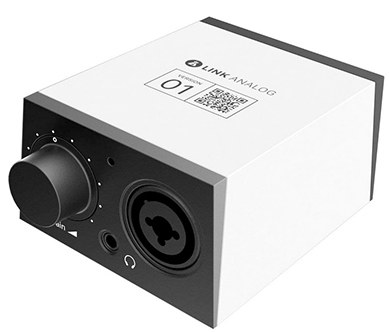
The Bandlab Link Analog is the OG of Bandlab products. It was the first portable audio interface to be released by Bandlab. The Bandlab Link Analog features a rechargeable battery, a 1/4″ Neutrik combo jack, and 1/8″ headphone, and 1/8″ TRRS speakout output jacks. The Bandlab Link Analog shares a lot of functionality with the mini except it’s a bit bulkier and requires a charged battery for use.
Audio Interfaces – Plug-N-Play Vs. 1/8″ Input
Connecting your device to Bandlab will vary depending on the type of interface you are using. If you’re using an interface that is connected via USB (e.g., Bandlab Link Digital), then simply plug in your USB audio interface and Bandlab will automatically detect it. You’ll see a notification in the bottom left corner telling you that the device has been connected and is ready to use:
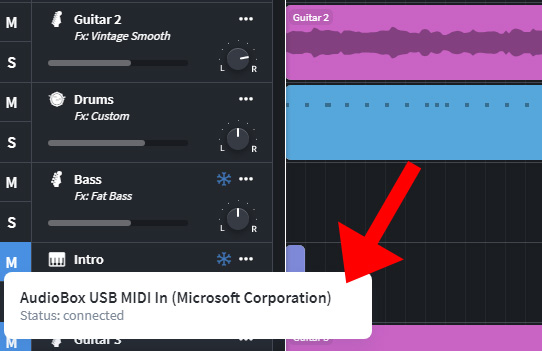
This is the beauty of plug-n-play devices — you simply connect them and most DAWs, including Bandlab, will recognize them and automatically make them your current recording device. If you’re running into issues getting your device connected, you may need to refer to your device manual or browse the device manufacturer’s website for troubleshooting information.
Alternatively, if you’re using an audio interface that connects via your 1/8″ input, you won’t have to do anything extra to get started once your interface is connected. Since the interface is connected through your device input, you should be all set considering the standard input is usually the default recording device.
Bandlab Track Types and Presets
Once you have your audio interface connected, you can then plug in your real instrument and select a specific track type in Bandlab by clicking the Add Track button. For guitars, select a guitar track; for basses, select a bass track. It’s that simple. When you select a specific type of track, you’ll get access to a plethora of Bandlab presets! You can access these by clicking the Fx Effects button in the bottom left corner. You’ll then see a dropdown menu for Presets — click this to see a full list of all the guitar or bass presets available:
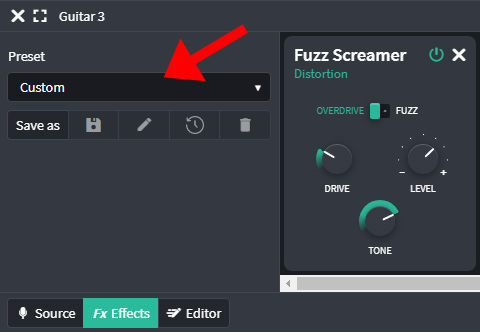
We’ll be diving into some of the presets and how to craft your own sound using Bandlab effects in later tutorials. Feel free to play around with these and go ahead and hit that record button to lay down some instrument tracks.
Read More: Get your lyrics up to snuff with our post on the best tips for songwriting!
Recording Real Instruments in Bandlab
See — recording real instruments in Bandlab is easy. We walked you through using your laptop, tablet, or mobile device’s built-in microphone to record instruments. We also discussed getting your instruments connected to Bandlab via an external audio interface using a variety of connection types (i.e., 1/8″ input jack, USB, Firewire, Thunderbolt, etc.).
We’ll be diving into some of the guitar and bass presets in later tutorials — check back soon and subscribe to our newsletter today!
Recording Actual Instruments in Bandlab FAQ
Can you play a guitar in BandLab?
Bandlab is a full-fledged DAW and can record guitars, basses, and any other real instrument. In order to do this, you need to have an audio interface to connect your instrument. Read more in our recording instruments in Bandlab guide!
How do you connect a guitar to Bandlab?
Guitars and other external instruments can be connected to Bandlab via an audio recording interface.
What interface works with Bandlab?
Bandlab functions like any other DAW and will work with any audio interface that allows you to record sound onto your computer. We recommend the Focusrite Scarlett 2i2 for home recording enthusiasts–it’s one of the best-selling and easy-to-use audio interfaces on the market today.